Note: You only have 10 days from ‘upgrading’ to Windows 11 to go back to Windows 10
Going back to Windows 10 takes about 7 steps. If you feel confident with the steps below, you can try them. If you are beyond the 10 days, or you aren’t comfortable with the steps below, please contact Hish.
Steps for downgrade: Here’s how you can downgrade Windows 11 to Windows 10:
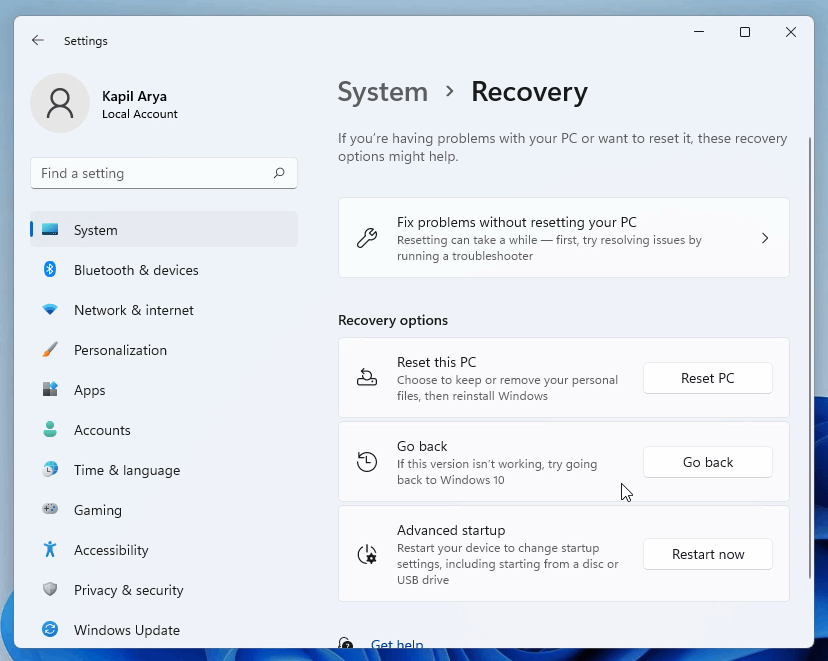
1. Open Settings app on your Windows 11, go to System > Recovery. Under Recovery options, click Go back.

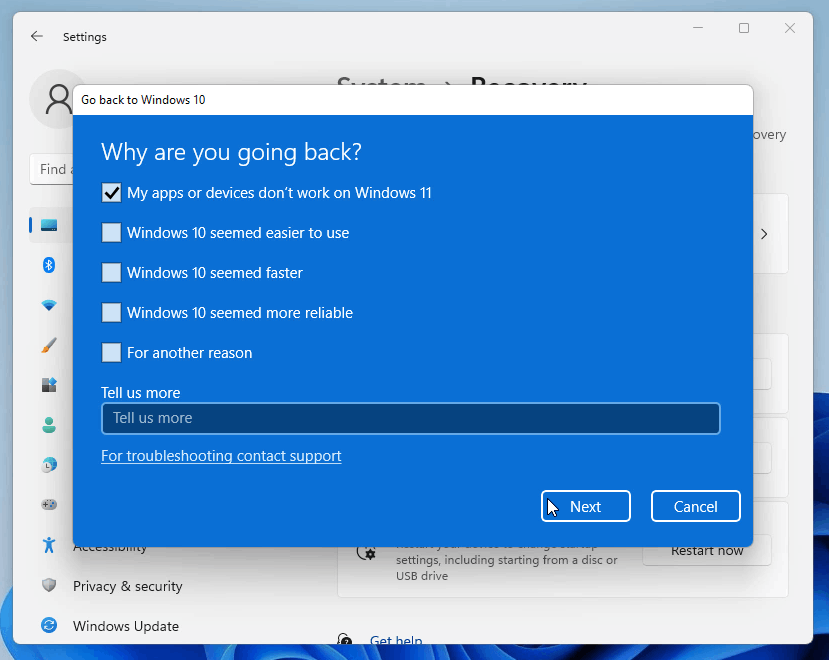
2. Now Go back to Windows 10 screen should appear. Under Why are you going back, select a reason, don’t choose Tell us more and click Next.

3. In the next Check for updates screen, choose “No, thanks”.

4. Under What you need to know, make sure you go through this information completely. When you’re ready, click Next.

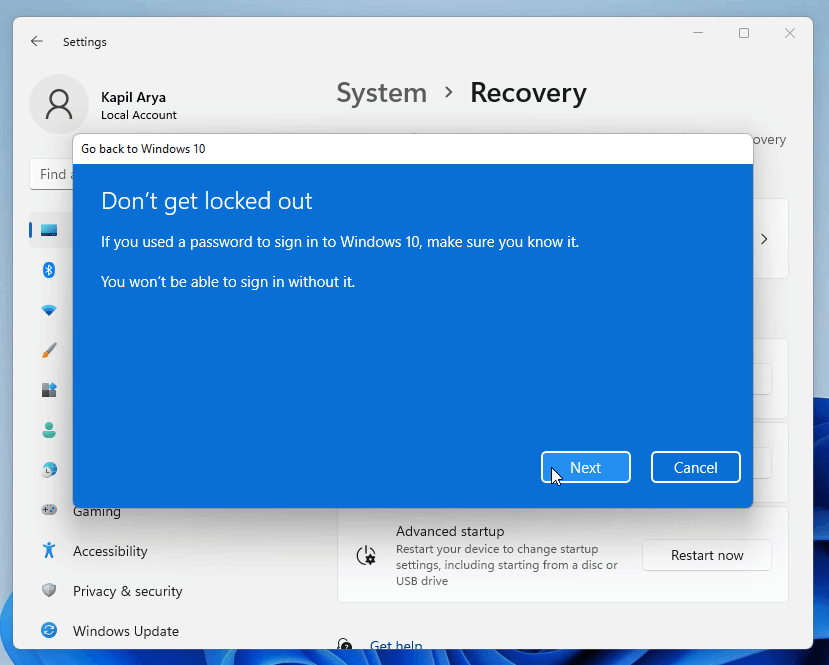
5. As per the next screen, make sure you remember Windows 10 password so that you don’t get locked out. Click Next to proceed.

6. Finally, click on Go back to Windows 10.

7. Your system will now restart.

8. After restart, you’ll see Attempting to recover installation.

9. In few moments, you’ll see Restoring your previous version of Windows. This will take time depending upon your system and data being restored.

10. After this, your system will restart and this time you’ll see Windows 10 boot screen.

11. Then in next few moments, you should be able to login to your Windows 10.

12. After login, you can check your Windows 10 version by running winver command.

This completes the downgrade process from Windows 11 to Windows 10.
Video demonstration: If you need help with above steps and live illustration, you can refer this video guide:
